
All work and no play would also make Jack a dull boy. And growing up, you must have come across shows like Art Attack where Niel Buchanan (Wikipedia) makes some awesome arts and crafts materials out of things easily available at home. Especially paper!
He mostly used a mixture of paper and glue called papier mache (papier–mâché) which is a commonly used craft-related ingredient. We will learn more about it in the sections that follow.
So come on, let’s take a stroll down the memory lane to revisit the artsy side of ourselves.
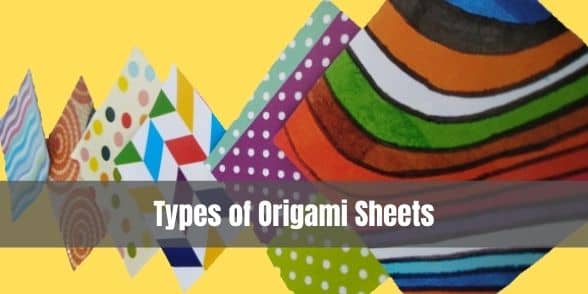
There are various ways you can productively utilize your time to create something handy out of it. If your aim is to create paper, then you have come to the right place. Now, let’s talk paper.
DISCLAIMER: MoneyMintz is reader-supported. If you make a purchase through links on our site, we may sometimes earn a commission at no additional cost to you. As an Amazon Associate, we earn from qualifying purchases.
Let’s begin at the beginning!
There are various ways to make different types of paper at home. However, it may be a relatively lengthy task that requires patience as it takes time for the solution or mixture, i.e., papier mache to dry. But if you’re determined then the patience will eventually pay off.
Keeping that in mind, let’s explore that which awaits us.
Making paper out of scrap and decorating it with leaves
Imagine if you could give your loved ones their favorite flower elegantly laid out on handmade paper with a personal note on the side. We cannot think of a more intimate and personal gift.
The best part about this gift-making gesture would be that it can be made out of materials easily available at home. All you need is some time to invest in it, and the creative surge.
So let’s dig into the intricacies and learn how to make paper out of scrap and decorate it with naturally intriguing scents.
Moreover, why stop at decorating? You can also frame the handmade paper with an elegant and gracefully interlocked petal, flower, or leaf in it.
Here’s how you should go about making this type of handmade paper.
Supplies:
- Scissors
- Blender
- Spoon
- Picture frame
- Window screening
- Natural colorings, such as tea or coffee
How to go about it?
Step 1: Preparation
Before you begin your pursuit onto the land of handmade paper, you need to ensure that you are prepared. And a key equipment closely interlinked to this preparation is the mold. You can easily make a mold out of picture frames 5” x 7” or 4” x 6” in size along with a piece of plastic needlepoint canvas cut according to the size of the frame.
An extra suggestion:
If you would like a finer texture on your finished handmade paper, then cut a similar sized layer of plastic or wire window screening. Now, lay this piece on top of the plastic canvas which was earlier placed into the frame.
Step 2: Shredding
The next step is to shred the scraps of paper into thin strips. For this purpose, there are many types of scrap paper available including junk paper, office paper, wrapping paper, envelopes, greeting cards and even paper towels.
If you are looking for making a really white paper, then ensure that there is no ink on any of the paper that you use.
Now, run these pieces through a paper shredder or shred them into pieces using your hand. Place the strips of paper in a bowl filled with hot water.
Step 3: Soaking
Ensure that you use different bowls for soaking different colors of paper. Soak them for at least 2 hours. Softer papers such as newspapers take less time to disentangle into a pulp than harder papers such as greeting cards. Therefore, soak accordingly… preferably overnight.
Step 4: Blending
Get a blender and add two cups of water to it. Now, add two handfuls of paper pulp that you kept for soaking. Put on the lid and turn on the blender for up to 15 to 30 seconds of blending. If the mixture is pasty and thick, then add more water and run it for 15 to 30 seconds more.
Paper pulp is usually grayish, yellowish or pinkish dispensing on the type of paper you use. If you want colored paper, then you can add a few drops of food coloring depending on which color you want.
Step 5: Customization (optional)
You can experiment with various types of ingredients such as lemon zest, onion skins and other fruit peels to give a unique texture to the paper pulp.
You can cut the ingredients into long thin strips and use a handful or two of these trimmed leaves, plants, or fruits with a handful or two of this soaked paper.
Step 6: Decorating
After blending, take out the paper pulp thus obtained into a large vessel. Now, get a few handfuls of flower petals, or even neatly trimmed leaves and mix them with the paper pulp mixture.
An extra tip:
For better results, ensure to stick to very small whole flowers or flat petals. Moreover, shred the curved or larger petals or flowers into smaller pieces so that they don’t stick out of the paper but glue to the surface evenly.
To further personalize the process, you can also add a few drops of essential oils or other sorts of fragrance to the pulp. You can also use tea or coffee powder to give the paper an archaic and medieval appeal.
Step 7: Molding
Now, pour about half the paper and petal mixture onto the mold. Use a spoon to spread it evenly all across the mold. It is here that you will decide if you would like your paper to have smooth edges or a rustic yet zesty appeal to it.
Step 8: Screening
Place one side of the mold on a dish towel or any other absorbent surface. Flip the mold over. Starting from the middle and working your way to the edges, press firmly on the screening using a sponge. This would flatten the paper and drain out excess water from the paper pulp. Now, remove the screening.
Step 9: Drying
Place your hands on each side of the dish towel to gently hold up the dampened paper situated in the middle of it. Pick it up and place the towel at a cool, dry and well ventilated area. After a few hours, gently try and peel the sheet of paper out of the towel and place it on a drying rack. You can also hang it on a cloth hanging line using hanger clips. If the paper starts curling up a little too much, then you can flatten it by placing some heavy books on top of it after it has almost dried up.
Go Green with Recycled Paper
Disposing off your copy paper, junk mail, scrap papers and old receipts might come with a surmounted crown of guilt. All this paper just being tossed into the bin? Small pieces of these sorts of papers amount up to a huge amount of paper wastage when considered at a global scale. Thus, here is an amazing and creative alternative to saving paper.
What if we told you you could recycle all that paper and use them as small notes and cards with quotes on them? It sounds stupendous, does it not. With that assured, here is a way for you to create paper by recycling these receipts and other such mini paper rectangles that you would otherwise throw away.
Supplies:
- Water
- Vat, or a plastic storage tub
- Scrap paper
- Kitchen blender (visit a thrift store to get one if you do not have one)
- Mold and deckle (you can also easily make one at home)
- Sponge and rolling pin OR wood boards
- Towels, cloth, wool blanket, or any other absorbent material
How to go about it?
Step 1: Cut your paper into squares of about one inch. Soak the squares for a few hours, or preferably overnight.
An extra suggestion:
Printmaking, drawing, or watercolor paper are generally the best to be used here as these types of paper are made from strong fiber (for example, cotton rag) rather than chemically manipulated tree fiber. The type of paper you use also determines the final quality of your paper, so choose wisely.
However, if you are creatively enthused then experimenting with grocery paper bags, junk mail, office papers and even yellow pages won’t do much harm. Any sort of paper but plastic.
If you have the time and the interest, then you can also experiment with different color combinations.
Step 2: Blend the mixture thus obtained and make a vat of pulp out of it.
For this purpose, get the kitchen blender and fill it up with water. Throw a few scraps of the trimmed squares of paper, but do make sure that you do not throw in a lot of them or it might burn up the blender motor out. Go on and blend until the mixture has turned into pulp.
Add the paper pulp about ½ or ⅓ way through the blender and add water to it. The more the ratio of pulp to water, the thicker your paste will be.
Step 3: This is where you will require the mold and deckle, which are basically two frames of the same size, one out of which is attached to a screen. If you do not have one, then you can also make through easily available materials at home.
Now you must be thinking about how to proceed with the sheet of the paper mixture. Well, here is a guide to help you through the process:
- Stir the vat of pulp obtained.
- Place the deckle evenly on top of the mold side.
- Now, holding them together, dip the mold and deckle till the bottom of the vat and scoop it up thus holding it horizontally.
- As you lift the mold and deckle out of the paper mixture, give it a quick back and forth and left to right shake. This will align the fibers thus creating a uniform sheet. Don’t shake until the sheet has completely drained out.
- Ensure to let the paper mixture settle to an extent that the water has drained to a drip.
Step 4: Couching (Pronounced Coo-ching)
In the paper industry, couching is referred to as the process of transferring the wet sheet of paper onto a flat absorbent surface. The ideal absorbent surface for this purpose would be wool felts, however smoother towels, wool blankets, bedsheets, or thick paper towels are also commonly used as an alternative.
Place the wet sheet of paper onto the felt with a flat board underneath it.
- Now, remove the deckle from the top of the mold.
- Place the mold facedown in one smooth motion and then press it down. Now, lift the mold from the initial edge.
Step 5: Pressing
Place a paper towel on top of the now couched sheet. Use a sponge and press gently at first. Progressively apply as much pressure as you can such that the paper is thin and crisp.
Step 6: Drying
Drying is the easiest out of all the other steps in this procedure of making paper at home. Just take the sheet of paper and lay it down on a tabletop, counter, desk, or any other flat surface where no one would tamper with it.
Viola! Your home made paper is ready to be showcased.
A small tip:
If you have more leftover paper pulp in the tub, then you can scoop it out and drain all the water out of it. You can do that using a strainer, be it a mesh paint strainer bag or a fine mesh pasta strainer. Squeeze the leftover paper pulp into a ball. Now, let it dry. You can keep this hardened papier mache someplace safe.
The next time you need to use this, just soak the hardened ball of paper pulp in water overnight and it will be ready to go.
Let’s get virtual!
Hope you have a better idea on how to work about making your own homemade paper, but in case you’re still a tad bit unsure on how to go about it, then here is a link to a YouTube tutorial that will definitely help you understand the process better.
“DIY Handmade Paper | how to make handmade paper without frame | Recycle Paper”
In this YouTube tutorial, you will learn how to make handmade paper without a frame.
This video adopts a very easy way to explain the process with the use of easily available materials at home, such as paper scraps, a blender, a sieve or a strainer, a roller, and an absorbent cloth-like material such as a dish towel or wool felt.
So embrace your creative side and click on the link to explore yet another amazing way to make handmade paper.
Frequently Asked Questions
Can I make paper at home?
Yes, you can make paper at home with easily available materials such as some scraps of paper, a blender, a sieve and a towel or a dish towel. Furthermore, you can also add food color and other essential oils to make colored and fragrant paper.
Can I recycle paper to make homemade paper?
Yes, you can recycle paper to make homemade paper. In fact, it is highly encouraged as it decreases pollution in the environment and saves paper. In addition to this, homemade paper is the most personalized gift your loved ones could receive. You can write a quote on it, or decorate it with flower petals and leaves and frame it to give it a more personalized touch.
Can I make an envelope out of homemade paper?
To answer that question vaguely, yes you can make an envelope out of homemade paper but it is recommended not to do so if the paper has come out a little disintegrated. This would make it very difficult for the thick texture of the paper to be folded into the flat edges of an envelope.
Can I make colored homemade paper?
Yes, you can make colored homemade paper. All you would require is some food colors that go along with which color you would like it to be. You can also add some essential oils for fragrance.
What can I do with excess paper pulp?
You can strain excess water from the paper pulp and squeeze the remaining paper pulp into a ball. Leave it in a cool area to dry. You can store this dried-up ball of paper pulp and the next time you have to use it, all you have to do is soak it in water overnight and it will be ready for use again.
Conclusion
In order to stay vibrant and creative with a flexible mind, it is necessary to challenge it at an artsy level to explore and challenge its limits.
Of course, there are various other ways through which you can attain that, but personally speaking, making paper out of hand with writing something from the heart is the most valuable present your loved ones could receive.
Moreover, this is an absolutely splendid way to use up scrap paper. So what are you waiting for?
You can visit Wikipedia, in case you want to learn more about papermaking.
I know you might be now bustling with different ideas. If you want others to take note of it, please leave the details in the comment section. We will for sure try to include it when we next update the blog on DIYs To Make Different Types Of Paper At Home.


Avni Deopura
Content Writer
An SEO Expert, a Prolific Content Writer, and a dreamer currently pursuing a postgraduate degree in Master of Science in Psychology from St. Joseph’s College of Arts and Science. She is working as a Content Producer and Social Media Analyst.
End of – “Easy DIYs To Make Different Types Of Paper At Home“
Related Articles
- Tombow Mono Zero Eraser Refills Review: Are They Worth It?


- Tombow Mono Zero Eraser Review: The Best Eraser for Precision Work?

- 6 Best Pencil Cap Erasers for Kids: A Must-Have School Supply

- 7 Best Toy Erasers for Kids: Top Picks for 2023

- 7 Best Erasers for Artists: Top Picks for Clean and Precise Erasing

- DIY Eraser Crafts: Beyond Erasing